![🧟 Task Zombies: When [weak self] is not enough](/weakselfheader.webp)
We’ve all written this a thousand times:
Task { [weak self] in
    await self?.downloadData()
}
We use [weak self] religiously to avoid memory leaks. ✅ Problem solved, right?
Well, not quite.
The problem you didn’t know you had
Imagine this super common situation:
class ProfileViewController {
    func loadProfile() {
        Task { [weak self] in
            let photo = await downloadHugePhoto() // 10 seconds
            self?.profileImage.image = photo
        }
    }
}
The user opens the profile, but 2 seconds later they change their mind and close the screen.
What happens?
- ✅ The ViewController is destroyed
- ✅
selfbecomesnil - ✅ No memory leak
- ❌ BUT the download keeps running for 8 more seconds 🧟
You’re wasting battery, data, and CPU on something nobody is going to see.
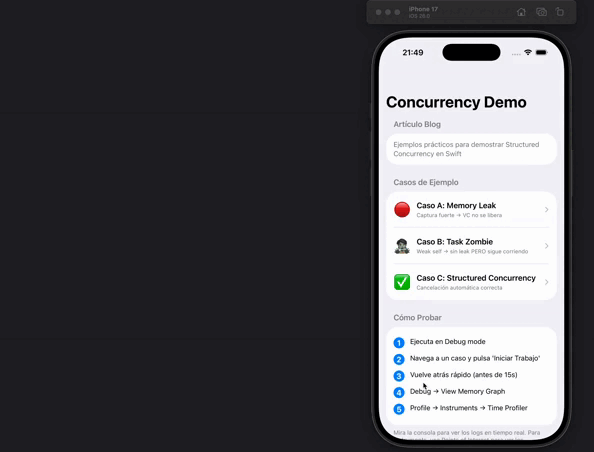
The demonstration: 3 real cases
I started investigating this and created a test app with 3 cases to understand what was really happening.
🔴 Case A: Memory Leak
The classic problem we all know:
class CaseAViewModel: ObservableObject {
    private var task: Task<Void, Never>?

    func startWork() {
        // ❌ Doesn't use [weak self] - strong capture
        task = Task {
            await self.performWork()
        }
    }
}
What happens:
- Task retains → self
- self retains → task
- Closed cycle ♻️
Look at the logs: after 22 ticks, deinit never appears. The ViewModel never gets released. Classic memory leak.
🔍 Proof in Memory Graph
If you open the Memory Graph Debugger and navigate to Case A several times, you’ll see this:
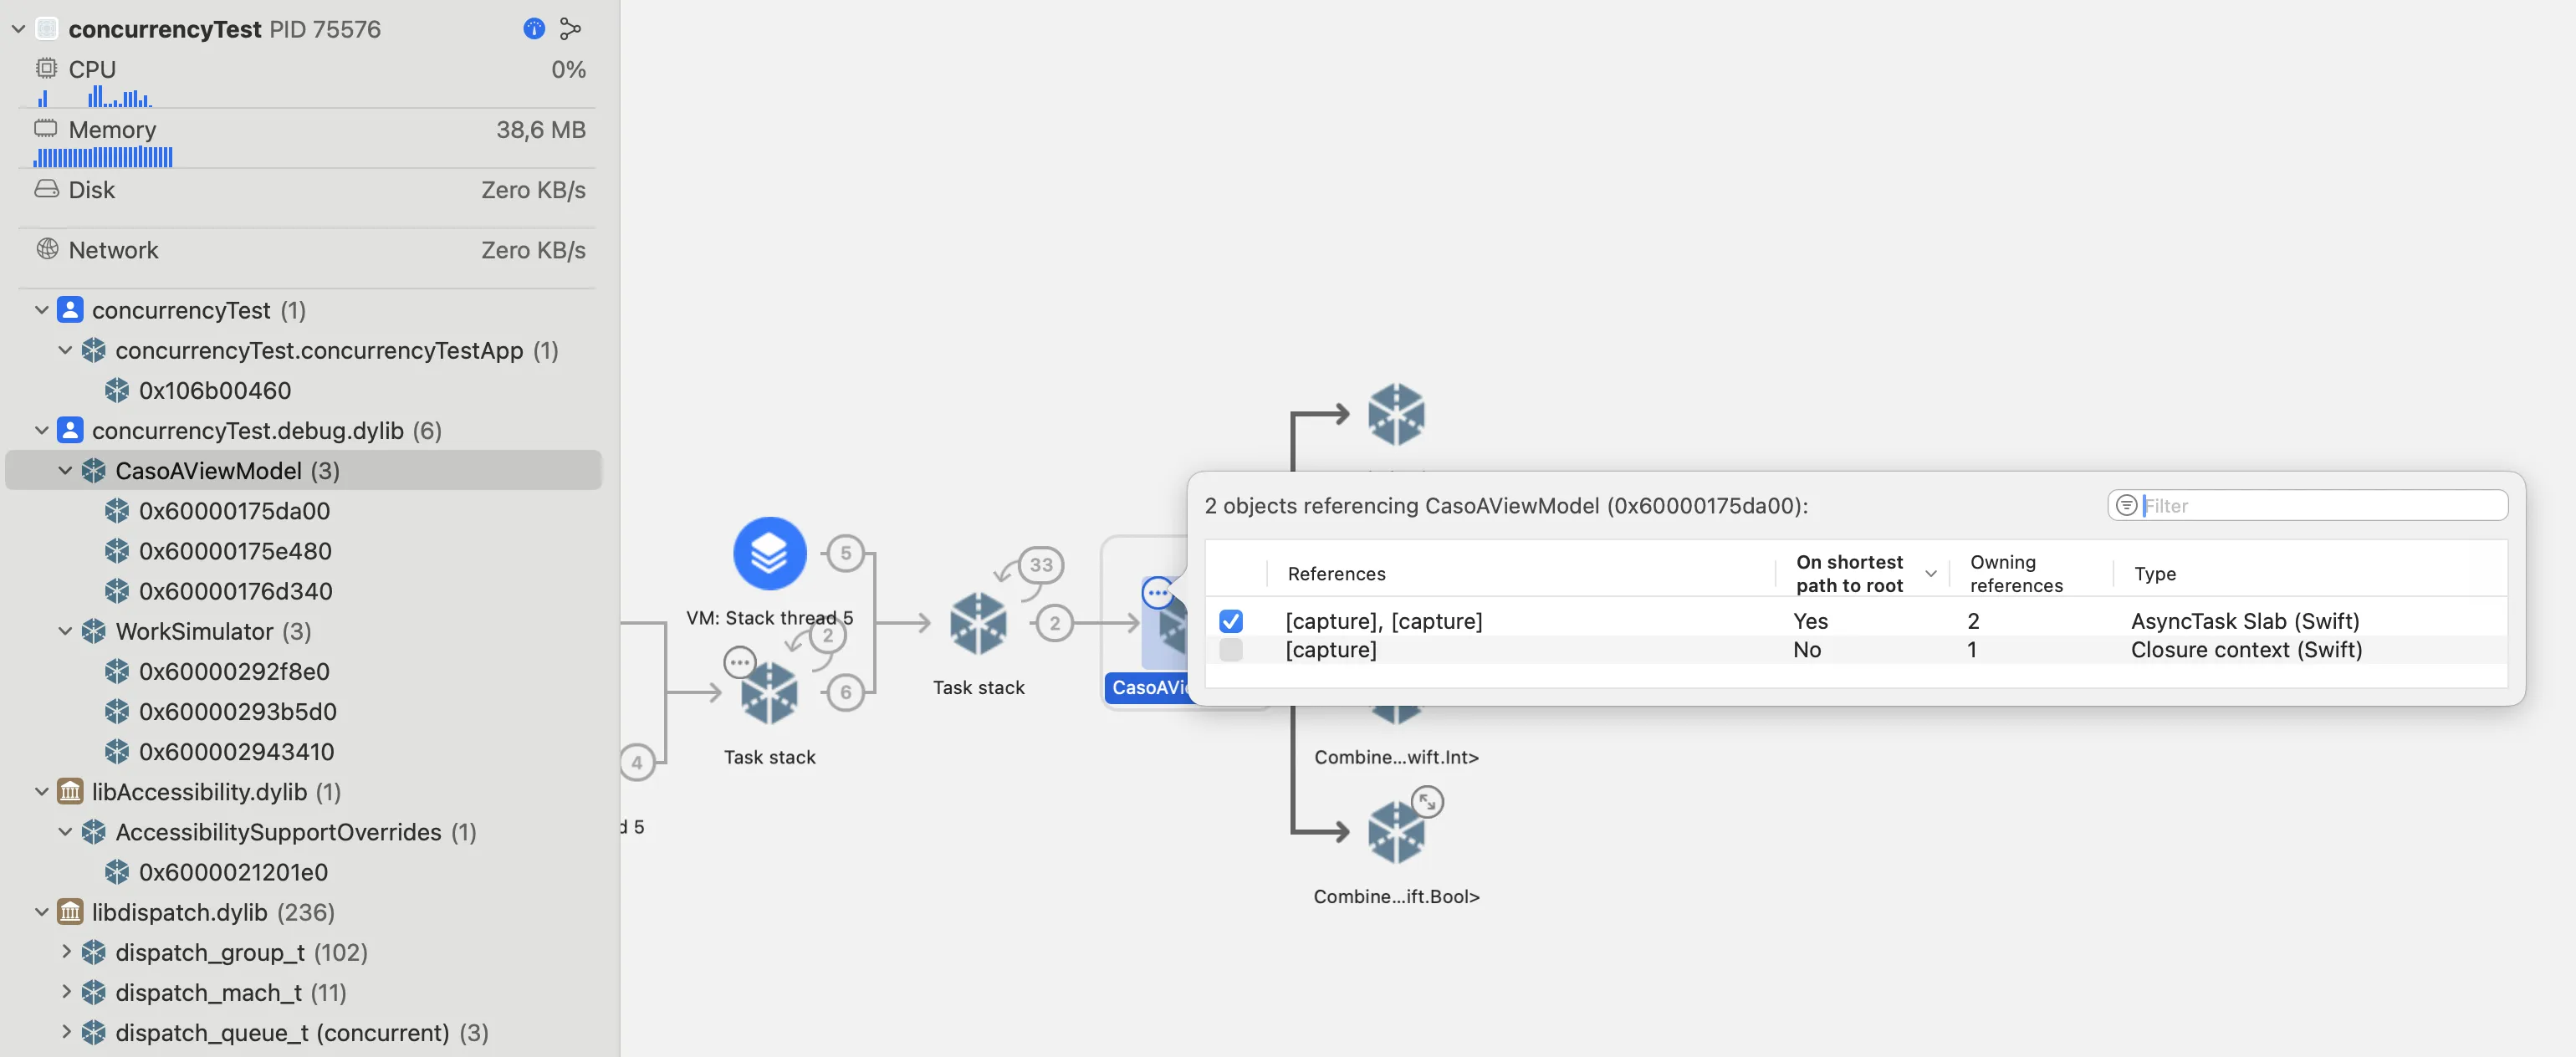
Look at what happens: in the left panel you see CaseAViewModel (3) - there are 3 instances of the ViewModel alive in memory at the same time. Every time you enter the view, a new instance is created but never released because:
- The Task retains the ViewModel (strong capture)
- The ViewModel retains the Task (
taskproperty) - Result: Closed cycle that prevents ARC from releasing memory 🔄
🧟 Case B: Task Zombie (The real problem)
We add [weak self] to avoid the leak:
class CaseBViewModel: ObservableObject {
    func startWork() {
        // ✅ We use [weak self]
        Task { [weak self] in
            await longWork()  // 15 seconds
            self?.updateUI()
        }
    }
}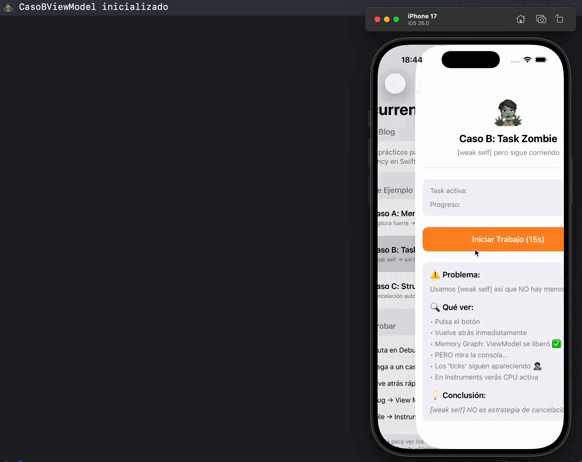
Look at this closely:
⚡️ Tick 6
💀 deinit called - View released from memory
⚡️ Tick 7  ← WHAT? Still running!
⚡️ Tick 8
⚡️ Tick 9
...until Tick 10
And here’s what’s interesting:
The ViewModel was destroyed correctly (deinit appears). No memory leak. ✅
BUT the Task keeps executing for 4 more ticks. 🧟
The real problem
This is where I started to understand something important: [weak self] breaks retain cycles, but DOES NOT cancel the work.
When the ViewModel is destroyed, the Task keeps running:
- ❌ The Task keeps consuming CPU
- ❌ Keeps using battery
- ❌ If it was a download, keeps downloading
- ❌ If it was an API request, keeps waiting for response
This is what I call a “Task Zombie”: there’s no memory leak, but you’re wasting resources without realizing it.
✅ Case C: Understanding how it really works
After investigating, I discovered that the solution requires several pieces working together:
class CaseCViewModel: ObservableObject {
    private var task: Task<Void, Never>?

    deinit {
        // 1. Cancel the Task manually
        task?.cancel()
    }

    func startWork() {
        task = Task { [weak self] in  // 2. Keep using [weak self]
            // Main work
            for i in 1...10 {
                // 3. Check if we've been cancelled
                if Task.isCancelled {
                    return
                }
                await self?.performWork()
            }
        }
    }
}
And in SwiftUI:
.onDisappear {
    viewModel.cancelWork()  // ← Cancel when user closes the view
}
Why so many pieces?
At first it seemed excessive, but each one serves a specific role:
[weak self]→ Avoids memory leak (we already knew this)task?.cancel()→ Sends the “cancellation signal” to the TaskTask.isCancelled→ The Task asks “am I being cancelled?” and stops
Cancelling a Task in Swift doesn’t stop it automatically. Cancellation is a signal, and the code must check it and decide to exit. If it doesn’t, the Task will keep running even though it’s “cancelled”.
❌ Cancelled, but NOT cooperative (Task zombie)
Task {
    for i in 1...10 {
        print("Working \(i)")
        await Task.sleep(for: .seconds(1))
    }
}
Even if you call .cancel():
- the Task doesn’t check
- keeps going until the end
✅ Cancelled and cooperative
Task {
    for i in 1...10 {
        if Task.isCancelled {
            print("Cancelled, stopping")
            return
        }

        print("Working \(i)")
        await Task.sleep(for: .seconds(1))
    }
}
Now yes:
- receives the signal
- detects it
- stops
What if I have resources to clean up?
If your Task opens network connections, files, or any resource that needs explicit cleanup, then yes, use withTaskCancellationHandler:
task = Task { [weak self] in
    await withTaskCancellationHandler {
        // Your work
        for i in 1...30 {
            if Task.isCancelled { return }
            await self?.performWork()
        }
    } onCancel: {
        // Clean up resources when cancelled
        stream?.close()
        connection?.cancel()
    }
}
But if you don’t have anything to clean up, you don’t need it.
UIKit vs SwiftUI
The main difference is where you cancel:
In UIKit:
You cancel in the deinit of the class that has the Task (normally the ViewModel):
class MyViewModel {
    private var task: Task<Void, Never>?

    deinit {
        task?.cancel()
    }
}
When the ViewController is destroyed, the ViewModel is destroyed too, and the deinit cancels the Task.
In SwiftUI:
You cancel in the .onDisappear of the view:
.onDisappear {
    viewModel.cancelWork()
}
You don’t need the deinit in the ViewModel because onDisappear already cancels when the user closes the view.
Now yes:
⚡️ Tick 7
👋 View disappeared
🛑 Cancelling work manually
🧹 Cleanup: releasing resources...
❌ Work CANCELLED  ← Stopped here
💀 deinit called
(END - no more ticks)
The Task stops immediately when you close the view. ✅
SwiftUI: when .task {} saves you all this
In SwiftUI, many of these concerns can be solved more simply using the .task {} modifier on the view.
Tasks created with .task {} are structured and tied to the view’s lifecycle. This means SwiftUI automatically cancels them when the view disappears or is recreated, avoiding “Task Zombies” by default without needing to use onDisappear.
Example:
struct ProfileView: View {
    @StateObject var viewModel = ProfileViewModel()
    let userId: Int

    var body: some View {
        ProfileUI(state: viewModel.state)
            .task {
                await viewModel.loadProfile(userId: userId)
            }
    }
}
In this case:
- The Task starts when the view appears
- Automatically cancels when the view disappears
- No need to store the Task reference
- No need to cancel manually in onDisappear
However, cancellation is still cooperative: the code inside the Task must respond correctly to cancellation (Task.isCancelled, Task.checkCancellation(), or async APIs that already cooperate).
Therefore, in SwiftUI:
- .task {} is the recommended option for view-bound work
- Storing and cancelling Tasks manually is still useful when:
- the Task is launched from actions (buttons, intents)
- the work doesn’t strictly depend on the view lifecycle
- you need explicit control (retry, cancel button, etc.)
The puzzle pieces
Store the Task reference:
private var task: Task<Void, Never>?So you can cancel it later.
Cancel when you don’t need it anymore:
// In UIKit (in the class that has the Task):
deinit {
    task?.cancel()
}

// In SwiftUI (in the view):
.onDisappear {
    viewModel.cancelWork()
}
In UIKit you cancel in the deinit of the class that has the Task (ViewModel). In SwiftUI you cancel in .onDisappear of the view.
The Task has to “cooperate” and check if it’s being cancelled:
for i in 1...30 {
    if Task.isCancelled {
        return  // I stop here
    }
    await work()
}
If you have resources to clean up:
Only if your Task opens connections, files, or other resources that need explicit cleanup:
await withTaskCancellationHandler {
    // Your work
} onCancel: {
    // Clean up resources
    stream?.close()
    request?.cancel()
}
If you don’t have anything to clean up, you don’t need it.
My checklist
Does it make sense for it to keep running if the user closes the screen?
- If the answer is NO → I store the reference and cancel in
deinitoronDisappear - If the answer is YES → I use
Task.detached { }(e.g., uploading a photo in the background)
Does the Task do work in a loop or can it take a long time?
- I check
Task.isCancelledperiodically to stop when cancelled
Are there resources to clean up? (network connections, open files, etc.)
- I use
withTaskCancellationHandlerto clean up resources when cancelled
You can see the complete code for these examples in this GitHub repo.
Resources
- 📚 Swift Concurrency Documentation
- 🎥 WWDC21: Explore structured concurrency
- 📖 SE-0304: Structured Concurrency
See you around 🫶